Strategies for Overcoming Designer’s Block

By: Sarah McKinney

Every graphic designer, no matter how experienced, has encountered the frustrating phenomenon known as designer’s block or creative burnout.  Designer’s block can manifest in various forms – from an absence of fresh ideas to an overwhelming feeling of creative standstill. It often creeps in the presence of impending deadlines, adding an extra layer of stress. For graphic design students, navigating the challenges of academia, while simultaneously overcoming designer’s block is a crucial skill to develop it’s essential to recognize that this is a common hurdle in the creative process, and you’re not alone in facing it. 

In this blog post, we’ll explore effective strategies to reignite your creative spark and keep the design juices flowing:

1. Embrace the Power of Breaks:

When faced with a creative roadblock, sometimes the best solution is to step away from the project. Take a break, go for a walk, or engage in an unrelated activity. This shift in focus allows your mind to reset and opens the door to new ideas. Consider incorporating the time-blocking technique –  This method involves dividing your workday into distinct blocks of time, each dedicated to a specific task or set of related activities. For graphic designers, this could mean assigning specific blocks for ideation, design execution, client communication, and even breaks.

Resource: Effective Time Management Tips and Strategies for Graphic Designers

2. Seek Inspiration Beyond the Screen:

In the digital age, it’s easy to fall into the trap of seeking inspiration solely from online platforms. Break free from this cycle by exploring the physical world. Visit art galleries, attend design-related events, or simply take a stroll through nature. Inspiration often appears when you least expect it, the textures, colors, and patterns you encounter can serve as a wellspring of inspiration.

3. Engage in Collaborative Creativity:

Collaboration can be a powerful remedy to a designer’s block. Connect with fellow design students, share your challenges, and brainstorm ideas. Hearing different perspectives can spark new thoughts and approaches. Also, consider collaborating with students from other professions to gain fresh insights that can infuse your designs with unique perspectives.

5. Establish a Design Ritual:

Establishing a design ritual is an effective practice to develop a conducive environment for creativity. For instance, curate a specific playlist that resonates with your design sensibilities – music that energizes, inspires, and helps you focus. 

Designating a specific workspace is another crucial element of your ritual. This could be a dedicated corner of your room, a coffee shop with the right ambiance, or a co-working space. A consistent physical environment helps create a mental association between that space and your creative work, making it easier for your mind to transition into a focused and imaginative state.

One part of a ritual that I frequently use to kickstart my creative process is doodling. Taking a few moments to doodle freely on a notepad or sketchpad can be a liberating exercise. These raw drawings often evolve into original ideas or serve as a visual brainstorming session, allowing your creativity to flow.

Another part of my personal ritual that has proven valuable is the act of writing down all thoughts and ideas. This process not only helps in organizing thoughts but also serves as a visual archive of ideas that you can look back on in the future. By putting pen to paper, you can explore connections between concepts, refine your thinking, and generate new ideas in the process

6. Explore Design Communities:

Engage with online design communities to connect with like-minded individuals. Platforms like Behance, Dribbble, and design-focused forums provide spaces to showcase your work, receive feedback, and become inspired by discovering the work of others. Participating in these communities can reignite your passion for design and expose you to new trends and techniques.

Resources: 

Behance  

Dribbble 

Awwwards 

Savee 

Branding style guides 

Conclusion:

Overcoming designer’s block is an ongoing journey, and each designer discovers what works best for them. By incorporating these strategies into your creative process, you’ll not only conquer moments of stagnation but also develop resilience and a deeper understanding of your creative self.  Designer’s block is a temporary setback, and with the right mindset and tools, you’ll find your way back to a world brimming with design possibilities.


Online Resources for Graphic Design

Graphic design of a laptop

By Claudia O’Brien

As a graphic designer, having a foundational knowledge of graphic design principles is essential but can always be helped with tools and resources. 

“We live in an age where there is endless information and material provided by renowned designers and artists online for free.” – Claudia O’Brien

I believe using this online field of information to an advantage is essential to any design student looking to advance their skills. In this blog, I will feature several of my most favored resources online.

Chico State’s Adobe Creative Cloud

I shouldn’t write a blog about this topic without mentioning our university’s prepaid subscription to Adobe. Adobe Creative Cloud is a subscription package that enables access to all Adobe software, fonts, free images, and more. If you’re a student enrolled at Chico State, all you need to do is submit a request to the university’s IT support team and download the Adobe Creative Cloud dashboard. The university offers this service completely free for students.

Colors

Sometimes knowing color theory isn’t enough to create an appealing set of hues right out of your head. My first go-to is Coolors.co. Fabrizio Bianchi founded the website and is a web developer known for creating exceptional and contemporary websites. 

The biggest sell on this particular site is its highly interactive color palette generator. The generator displays attractive color palettes that can be randomized to another color palette, customized by individual hue, be tested for color blindness/accessibility, and many more features on the same web page. Each generated color has its color codes on display for users that are looking for the most suitable hues for screens and printing. Besides the generator, the website has other unique features: hundreds of palettes created and shared by other users, a tool for picking colors from images, and a contrast checker.

Free Images

Free images are classified as public domain- they do not require copyright and royalty fees. Unsplash.com is a beginner-friendly site that has many high-quality free images. The website does not require users to make an account, and there is no limit on the number of images you can download. The images are categorized by themes of Travel, Nature, Business, etc. The site also offers a search engine. When clicked, each photo lists the photographer’s name, the location, and the type of camera used.

Mockups

A mockup is a model meant to display a product or design. An example is a design that has been digitally applied to an image of a T-shirt. When a design is shown to a client, they want to see what the design looks like on the product, not just the design by itself. Mockups can be created within Adobe software, but that takes time and skill. Smartmockups.com offers many customizable mockups free of charge. Users can upload their design to any of the offered images and 3D models and download a JPEG of a completed mockup image.

All in all, countless more free resources are available. I encourage any designer to take advantage of them, as they are there to be used! If you’re interested in learning about more design resources, this article provides various websites to check out.

Tips For Designers: How To Present Creative Work

By Sarko Sok

As designers, we learn to use our way of thinking and visualizing to our advantage, allowing us to create stunning work. We can spend hours on a single project and let our minds flow. It can be easy to become submerged in our work while diving into the creative process. That kind of passion may come to a halt for some of us when it comes to the non-design aspects of our work. This could be the organization of our files or documenting our design process as we go, but in this blog, we are going to be focusing on how to present creative work for your client.

Set your goal and know your audience

Before making a presentation, it is important to define the objective and how you can achieve it for your audience. Once that is determined, the next step is to understand your audience. Learn about their interests and motives so that you can ensure that your presentation is concise and relevant. What you are offering should feel like it is framed specifically for your client.

Tell a story

Storytelling is essential when it comes to presenting your work in any setting, and it becomes a very useful skill in life too. By being able to create a connection between you and your audience, you can spark interest in your audience and keep them engaged. Consider the tone and attitude you would like to achieve when presenting. Find a way to relate to your audience. Some examples could be through humor or shared experiences. You are essentially selling your work and your ideas so you want to sound confident and authentic. This will make your audience appreciate your presentation and trust you know what you are talking about.

Presentation visuals

The aesthetic of your presentation is equally as important as your creative work, since you’ll want to present your work as efficiently and effectively as possible. What better way to do so than by applying your design skills to the aesthetics of your presentation! 

Also, remember the design fundamentals that you apply to your creative work and do the same for your presentation.

 Some tips that help me on an everyday basis:

  • Consider your composition and utilize your negative space
  • Be creative with your text, but do not overdo it
  • Everything should still be readable 
  • Use font hierarchy to highlight important messages and clearly communicated content structure
  • Be selective with your text and take advantage of visual aids to keep the audience focused

Rehearse your presentation

A great way to work out any kinks in your presentations is to practice in advance, to ensure what works for you or what is not necessary to include. Once you familiarize yourself with all aspects of your presentation, you will be able to make the necessary adjustments to finalize everything. The presentation of your work should be treated the same way as your design work. Trial and error, revisions, and process work for design, all contribute to perfecting your work. Practicing your presentation will perfect your pitch to your client.

Adobe Illustrator: My 5 Essential Adobe Illustrator Tools


By Miguel Villalobos

Adobe Illustrator is a popular software application that designers and artists use to create different variations of artwork. This program specializes in creating vector graphics and offers many different design tools that are great for creating things such as icons, logos and illustrations. The program can seem overwhelming for people who are just starting out, however, it does get easier over time. Throughout this piece, I will walk you through a few of my favorite tools in Illustrator that have helped me improve my workflow and skills. 

The Blend Tool

The first tool I want to talk about is the Blend Tool. This tool can be found by going to Object > Blend. This tool can help you create unique and interesting blends between multiple objects, and has different settings that allow you to customize your blends as you work. 

Below is an example of using Object > Blend > Make, while using the Smooth Color option. As you can see, it blends the shapes together and creates a gradient.

Here is an example of using the Blend Tool with letters, while changing the options from Smooth Color to Specified Steps. You can clarify how many steps you want between each shape. You can find this by going to Blend > Blend Options.

Smooth Tool

The next tool I want to talk about is the Smooth Tool. The Smooth Tool really lives up to its name. It helps you smooth out paths that may be a little more rough or wonky than you would prefer. It is great for helping sharpen up your attention to detail on different vector shapes. 

In this example, I created a shape with a few rough edges. By selecting the Smooth Tool, and just running it over the anchor points a few times, it will smoothen out the edges for you. 

Type on A Path Tool

The Type on a Path Tool is without a doubt one of my favorite tools in Illustrator. It allows for you to make text write along different paths that aren’t just horizontal or vertical. You can use it for any path that you create, whether it is by using just a plain shape or by creating a path with the Pen Tool.

Here is an example of how the Type on a Path Tool works. You can create a path using any form. For this example, I just used a circle. Using the Type on a Path Tool, you simply click on the path and it will turn your path into a guide for your text. From here, you can manipulate the text and the beginning/end of the path. 

Here is an example of the tool being used on a different path that was created using the Pen Tool. 

The Knife Tool

The next tool I want to focus on is the Knife Tool. The tool is extremely simple, yet extremely effective. It really does exactly what you would expect. It allows you to slice through paths, giving you more precision with your vector shape building. 

As you can see, you can take any vectorized shape, and simply slice through the shape and it will create a new path. You can move or remove the new sliced part of your vector to fast track your process. 

Paintbrush + Brush Library

The Paintbrush Tool is a tool that allows you to hand draw strokes onto your artboard. You can find the Paintbrush Tool on the side panel or by using its shortcut, B on the keyboard. The tool lets you give your projects more of a hands-on aesthetic to them. 

Along with the Paintbrush tool, there is a whole library of different brush strokes you can utilize. You can find the Brush Library by going to Window > Brush Libraries. The Brush Library holds strokes such as watercolor brushes, calligraphic brushes, and even different types of borders that you can expand and vectorize. 

Here is an example of the different types of brush strokes being applied. 

Wrapping up!

Illustrator can be fun and with a little time and effort, it can become easy to use. All the different tools and icons can be intimidating at first, but instead of being afraid, just jump in and play around with them. I mean, what is the worst that can happen?  When you finally learn how to use one, it can feel extremely gratifying. Add that feeling of gratification alongside gaining more overall skills as a designer, and it’s a win-win! Thank you for reading and I hope that you learned something new along the way!

5 Creative Tools to Help You Design

By Jessie Chen

As we continue to experience the pandemic,it’s important to sharpen our tools. We all have tools that help us get through the day, as a mechanic has their tools, teachers with their educational tools, and we designers have tools too! So let’s go ahead and immerse ourselves into some design tools, because it may help you solve a creative issue. 

“Buckle up and get ready to make digital art at the speed of thought!” – Rob Hooks

Some of you may think these tools are common and you already know them, but we all can learn something new everyday. Now these are some varying tools that may not apply to everyone, but they all have their purpose in the creative field. 

  1. Adobe Capture

Adobe Capture is a great tool. It is a mobile application that is on both Android 

and Apple stores. It’s a really great tool for any designer, whether you’re 

freelancing or with an agency. Some perks are that it can help you figure out what kind of font your client is using, but they might not know off the top of their head. Or, the client didn’t receive it from a previous request from another designer, who didn’t include extra details like fonts and color. Adobe Capture brings up the most closely related font or that exact font. Another helpful tool within this application is the color option. Simply move your camera to your desired spot and it’ll pick out colors that work well together from your camera shot. You can move around the camera, as you move you’ll see at the top of your device the colors change accordingly. It will not set the color until you hit the capture button. There are many other functions within this application, but these are the ones that I found most helpful.

  1. Adobe Color

Adobe Color is a browser application that is really simple to use. You pick a color that you want to use as your main color out of the many options like analogous, monochromatic, or complementary colors, and many more. It’s great for creating your color palettes or helps if you are having trouble creating them! 

  1. Unsplash, Pexels, Pixabay.com

These websites are great to use if you happen to need a photo of professional 

quality and is non-copyright! They’re fabulous websites to check out if you’re in need of filler photos or free photo usage with your designs or websites or layouts.

  1. Behance

Behance is another great website. You can showcase your work or see other 

people’s work. It’s also a place to gain inspiration from in case you happen to hit a mental block and can’t seem to get any concepts out. Additionally, you can join in on conversations on other people’s creative work. Behance is a really a place of opportunity to explore and talk to other designers as well!

  1. Dafont

This website is resourceful for getting fonts or trying out new fonts for your 

creative projects! This site includes both paid and free fonts available for download. You can filter them out to get only free fonts, or however you want to filter out the font selections.

These are some of the creative tools that can help a lot in your projects. Check out the links below to find more tools to use. Also, these tools are optional, you don’t need all of them to be successful!

https://99designs.com/blog/design-resources/best-tools-for-graphic-designers/

Five Signs You’re Destined to be a Designer

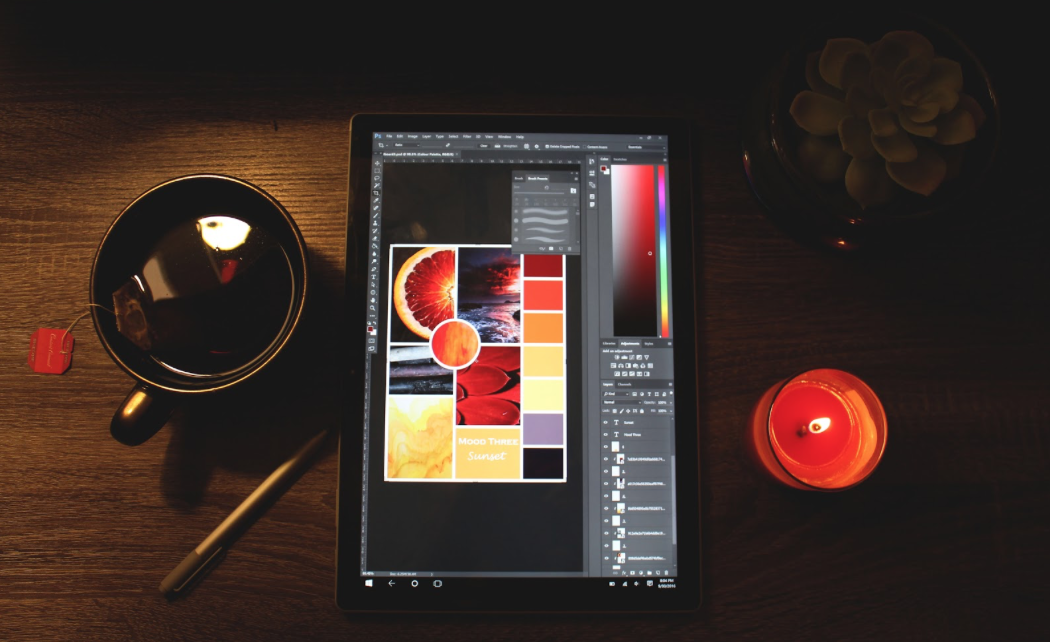
Photo of teacup, sketch tablet, and candle on desk

Starting college three years ago, I had a few very different ideas for the major I wanted to declare. I knew (or thought) I wanted to either be a nutritionist, psychologist, or dentist, none of which have anything to do with the major I am currently finishing my degree in today. As an 18 year old in my first year away from home I was confused and intimidated about the idea of having to pick a major that I would be doing for the rest of my life. I knew I wanted to make money and be happy, but didn’t know exactly what that meant yet. Now, three years later I am finishing my last few classes towards my bachelors degree in Graphic Design. I’ve learned a lot about who I am and what makes me a designer at heart, and there have been a few defining moments where a lightbulb went off in my head that insisted “you should be a designer!” These realizations led me to choosing Graphic Design and realizing that the little things that make me who I am were clues to what profession fit me and would maybe even make me money someday too. The following five tips led me to not only choosing design but realizing that design was a part of me. If you can relate to these in your own life, you may very well be destined to be a Graphic Designer.


1.You’re a people pleaser

I learned while meeting new people in college that I am a people pleaser, but in a good way. I like to solve people’s problems and am constantly communicating everywhere I go. Making others happy makes me happy. As a graphic designer I have found a passion for taking someone’s vision and making it come to life through design. I love watching a client’s face come to life when I present them with a final version of their ideas.


  1. You speak the language of color

Everywhere I go, I notice color. Designers don’t only see the color blue, they see sapphire, teal, turquoise, and navy. Even the smallest difference in shades of color catch a designer’s eye. I am constantly noticing good color palettes, clashing ones, and ones I want to use on my next project.


  1. You have a packaging radar

Ever since I was old enough to go shopping I have been judging products by their packaging. I often buy things just because of uniquely designed packages. I even have a few empty bottles of wine in my kitchen that I refuse to throw away solely because I love the labels. Designers have an eye for what catches attention and sells a product, and what screams bad design. I’ve always believed that packaging is more than just wrapping a product, it’s about first impressions and getting a sneak peak to what’s inside.


  1. You’re a typography snob

From poster headings to body text in a book, typography is the character of any message. To the average person, a font is just a letter on a page, but to a designer, each font tells a story and has a voice. I remember visiting restaurants and scanning the menu, noticing an alarmingly weird typography choice while everyone else was deciding what to order. Graphic Designers know that typeface choices are vital to a design’s message and sometimes say more than the actual words on the page. If you spend a copious amount of time picking the perfect typeface, it’s a true sign you think like a graphic designer.


  1.  You don’t have a taste for sugar coating

Ever since grade school, I’ve been intrigued by feedback. I’ve always had a way of taking constructive criticism and using it to my advantage. I always ask for people’s honest opinions on everything I do. Any feedback is one step closer to the solution. As a designer, you have to have tough skin when listening to someone else’s critique about a logo you just spent ten hours perfecting. To me, I never saw sugar coated criticism as anything but a waste of time. In order to grow and evolve a design, you have to accept that there may be a draft eight or nine in your future, but if you are excited and willing to re-do and revise, you think like a graphic designer!

By: Paige Hough

Photo by Paige Hough

Avoid Typographic Disaster – A Guide to Use Typography And Organize Presentations


As we all probably know now, the 2017 Academy Awards had the biggest screw-up in its 88-year history. When Warren Beatty and Faye Dunaway announced the nominee for the wrong category of award, they were just as confused as we were. They were given the Best Actress envelope when they were supposed to announce for the Best Picture. What is the cause of this disaster? ­

Typography.

On the nominating card, very small fonts are used on the award name and large bolded fonts are used on the nominee’s name. Warren could not read the it and a typographic disaster is created.

Typography is a study in process of making typefaces. Typeface is often called “font,” but this is a common misconception. A typeface is a series of fonts that make a font family. Font is just one character style that belongs to a typeface. Within the typeface, there are fonts with various weights and styles. Understanding what typeface, you are using and how to use them can enhance the attractiveness of your presentation.

I will guide you through what I have found about using typefaces in a presentation.


  1. Legibility

Legibility means being clear enough to read. It is an important aspect in using typography. This is most likely the first thing that you learned when you just start to write in elementary school. All alphabets have its specific written style. If we use a typeface that has too much decorative parts in a presentation (like a script typeface), it might create reading problems for your audience. Avoiding script and decorative typefaces can make your presentation look clean and easy to read for your audience.


  1. Using matching typefaces

Typefaces are designed to be used in various places, like paper documents, websites and presentations, but different typefaces can also work together to make your message clear in a presentation. A serif typeface like Times New Roman is normally good for smaller text but it would not work well for a title or heading because its long serif can be distractive. San serif typefaces like Helvetica are great for large texts but would look boring for smaller text. Sometimes you can mix and match serif and san serif typeface in one slide of a presentation.


  1. Focusing on function rather than form

When it comes to what typeface to choose, we often try to choose more complicated typefaces with unique forms. It might be interesting for a slide but most of time it only makes your audience more confused. A better way to find what typeface to use is to understand your content. For example, if you are doing a slide related to history, serif typeface can fit to the theme very well.  Try not to use typefaces that have complicated visual effects. If you really want visual effect, take a consideration of the legibility of that typeface.


  1. Over emphasizing

Sometimes we tend to emphasize too much on one point of a slideshow. Instead of a short phrase, people tend to write a crowded paragraph, which reduces readability of a slide. It causes people to squint their eyes and lose focus on the speaker. It doesn’t mean we shouldn’t emphasize anything. Sometimes certain content requires different level of emphasis.


  1. Creating hierarchy

Spending time on prioritize what is important content can help you categorize your points. Then lay out what is most important from secondary important. This also helps us to figure out how many words you will have on your slide. The goal is to eliminate unnecessary words and make the presentation cleaner.

At the end of the day, your presentation has to be simple and clear. The purpose of having a demonstrative piece is to help others to understand and organize knowledge. If a slideshow confuses people, it will defeat the purpose of having a slide show altogether. 2017 Academy Awards could be a lot more successful if the card designer of the event care about typography and organization in any form of visual communication.