Strategies for Overcoming Designer’s Block

By: Sarah McKinney

Every graphic designer, no matter how experienced, has encountered the frustrating phenomenon known as designer’s block or creative burnout.  Designer’s block can manifest in various forms – from an absence of fresh ideas to an overwhelming feeling of creative standstill. It often creeps in the presence of impending deadlines, adding an extra layer of stress. For graphic design students, navigating the challenges of academia, while simultaneously overcoming designer’s block is a crucial skill to develop it’s essential to recognize that this is a common hurdle in the creative process, and you’re not alone in facing it. 

In this blog post, we’ll explore effective strategies to reignite your creative spark and keep the design juices flowing:

1. Embrace the Power of Breaks:

When faced with a creative roadblock, sometimes the best solution is to step away from the project. Take a break, go for a walk, or engage in an unrelated activity. This shift in focus allows your mind to reset and opens the door to new ideas. Consider incorporating the time-blocking technique –  This method involves dividing your workday into distinct blocks of time, each dedicated to a specific task or set of related activities. For graphic designers, this could mean assigning specific blocks for ideation, design execution, client communication, and even breaks.

Resource: Effective Time Management Tips and Strategies for Graphic Designers

2. Seek Inspiration Beyond the Screen:

In the digital age, it’s easy to fall into the trap of seeking inspiration solely from online platforms. Break free from this cycle by exploring the physical world. Visit art galleries, attend design-related events, or simply take a stroll through nature. Inspiration often appears when you least expect it, the textures, colors, and patterns you encounter can serve as a wellspring of inspiration.

3. Engage in Collaborative Creativity:

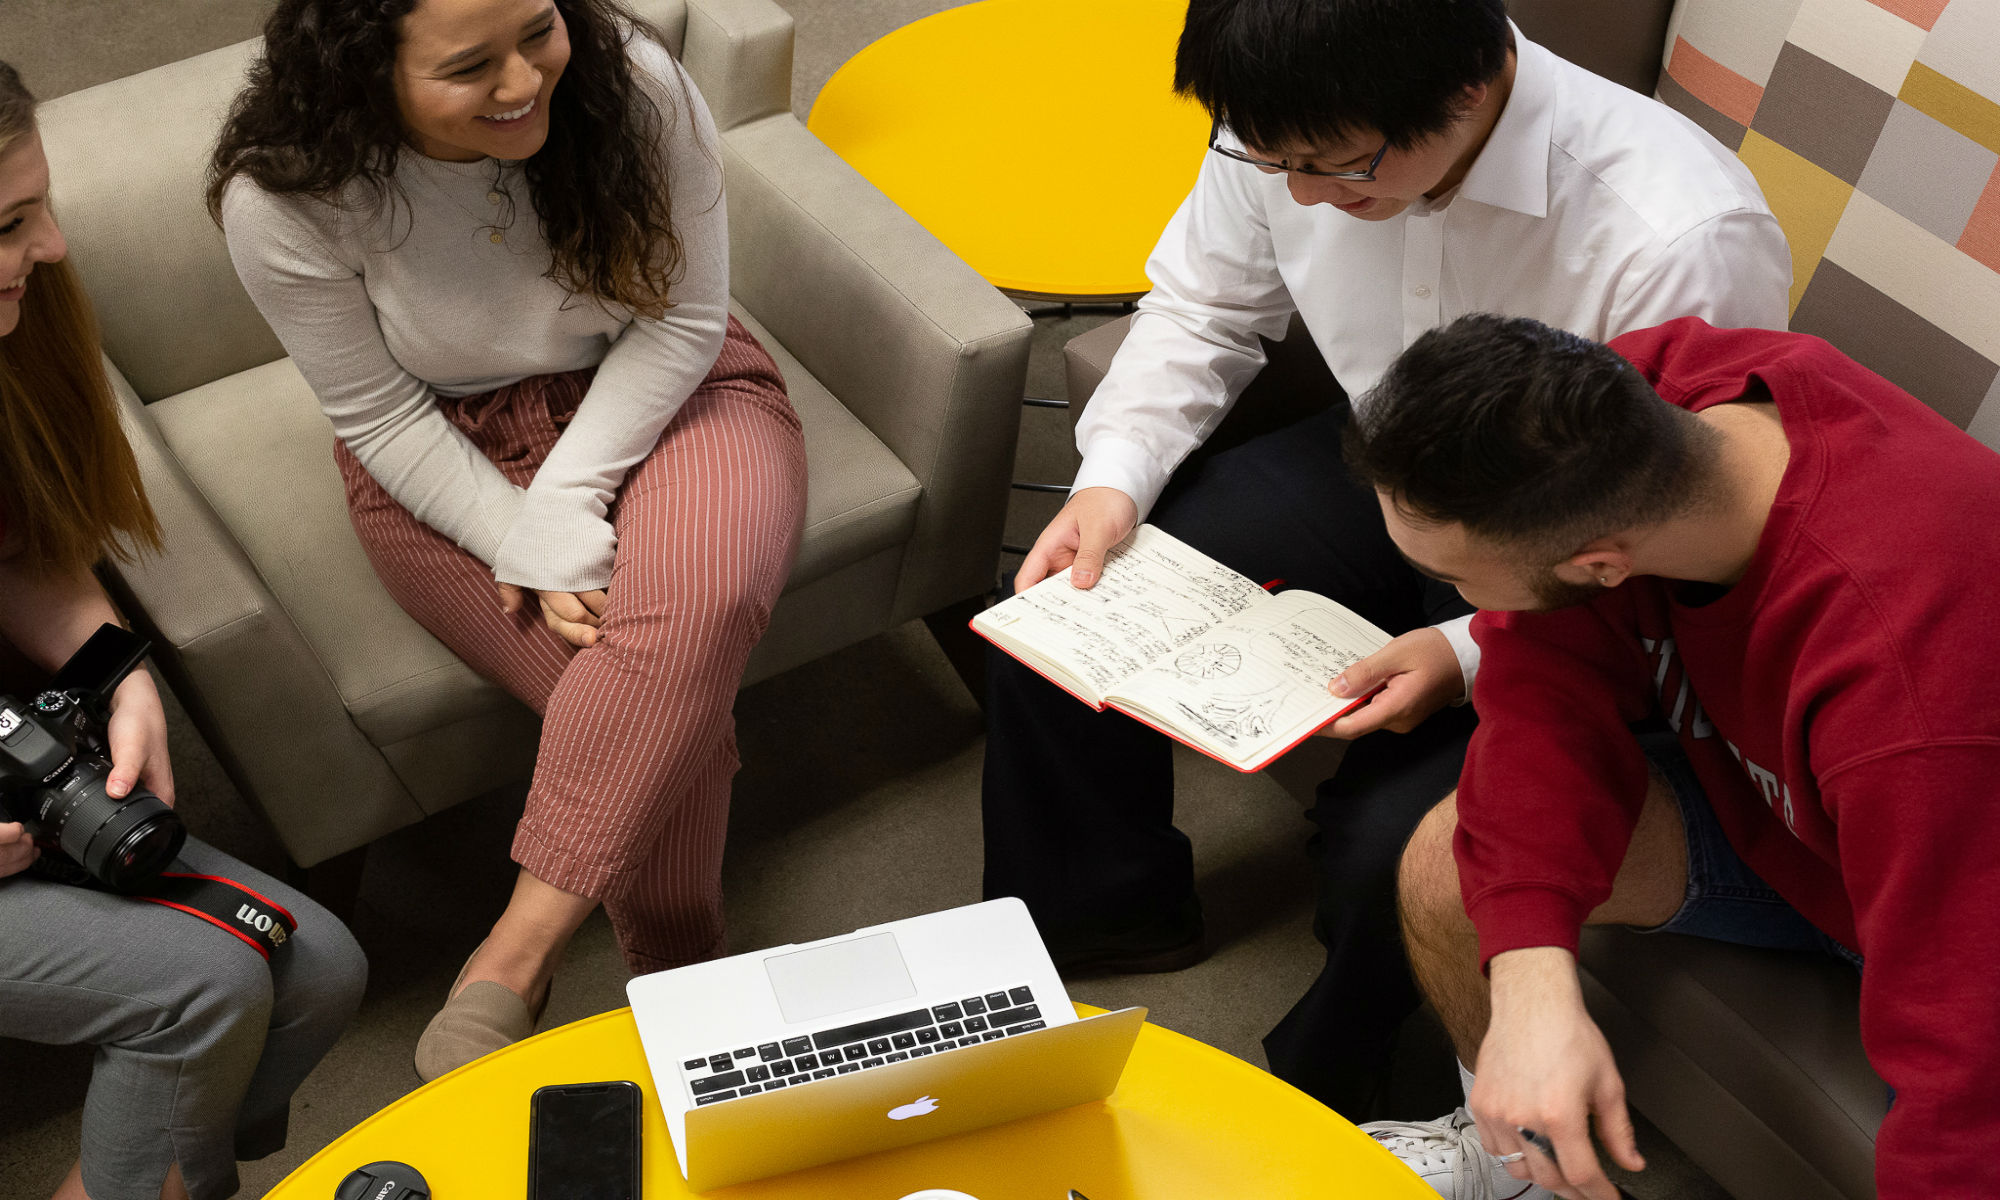
Collaboration can be a powerful remedy to a designer’s block. Connect with fellow design students, share your challenges, and brainstorm ideas. Hearing different perspectives can spark new thoughts and approaches. Also, consider collaborating with students from other professions to gain fresh insights that can infuse your designs with unique perspectives.

5. Establish a Design Ritual:

Establishing a design ritual is an effective practice to develop a conducive environment for creativity. For instance, curate a specific playlist that resonates with your design sensibilities – music that energizes, inspires, and helps you focus. 

Designating a specific workspace is another crucial element of your ritual. This could be a dedicated corner of your room, a coffee shop with the right ambiance, or a co-working space. A consistent physical environment helps create a mental association between that space and your creative work, making it easier for your mind to transition into a focused and imaginative state.

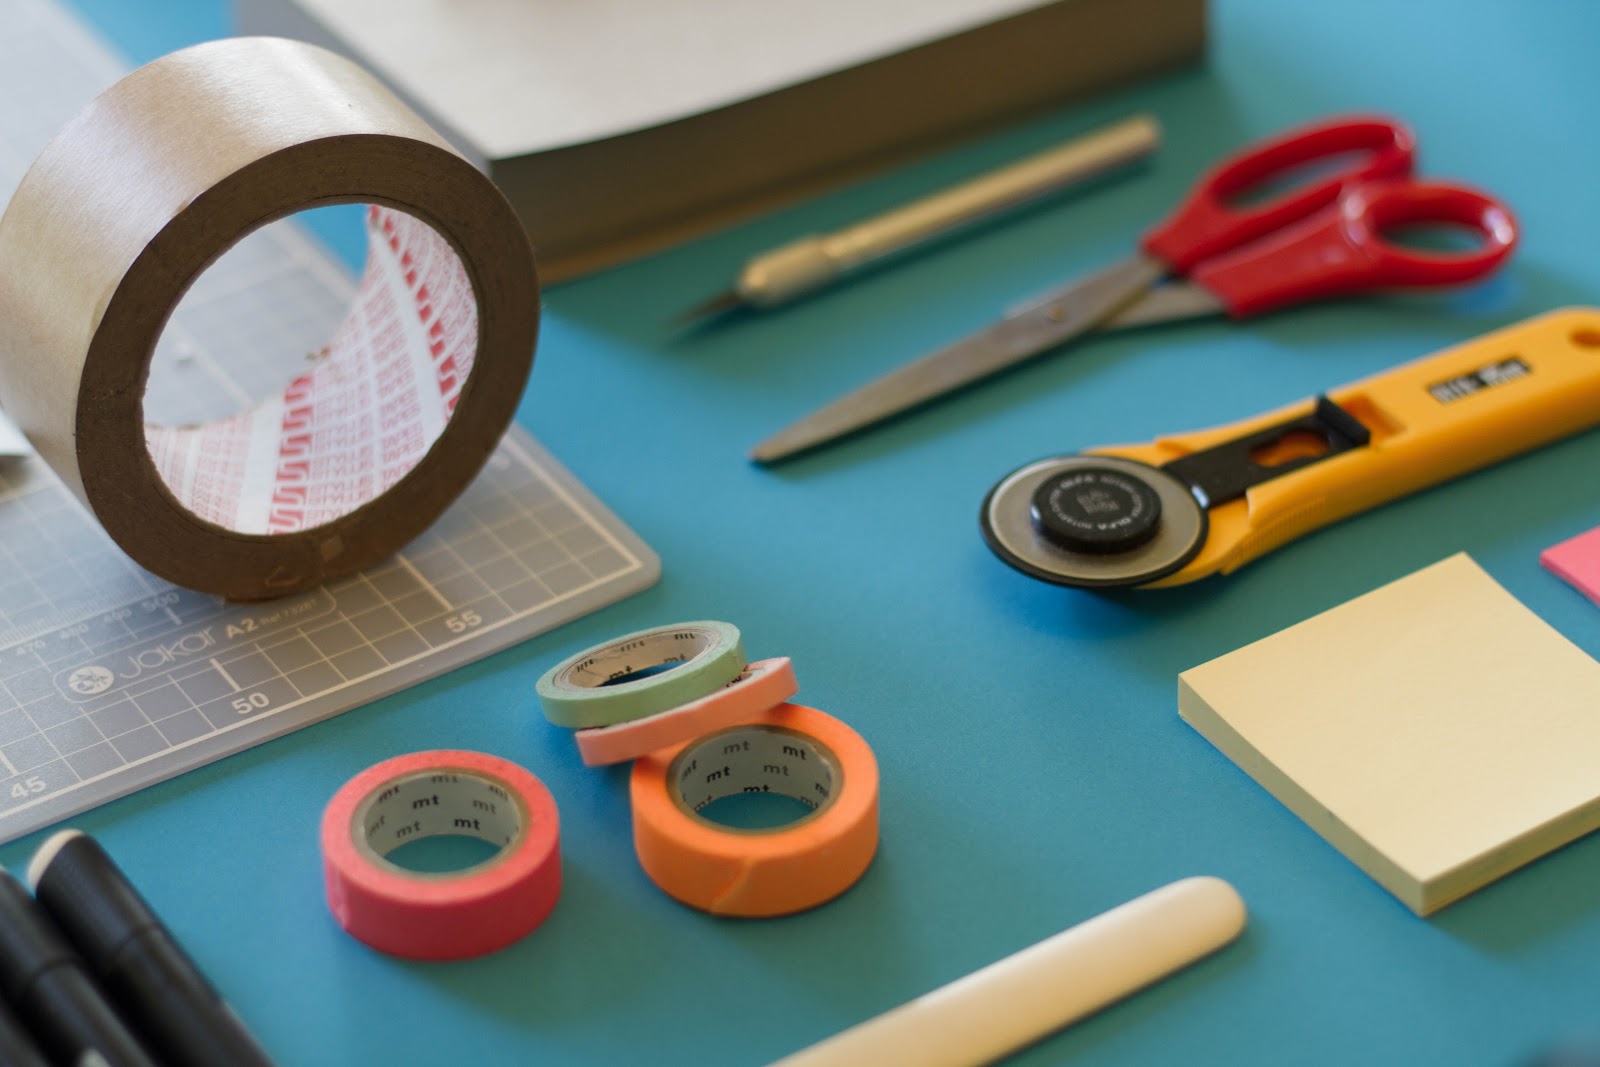
One part of a ritual that I frequently use to kickstart my creative process is doodling. Taking a few moments to doodle freely on a notepad or sketchpad can be a liberating exercise. These raw drawings often evolve into original ideas or serve as a visual brainstorming session, allowing your creativity to flow.

Another part of my personal ritual that has proven valuable is the act of writing down all thoughts and ideas. This process not only helps in organizing thoughts but also serves as a visual archive of ideas that you can look back on in the future. By putting pen to paper, you can explore connections between concepts, refine your thinking, and generate new ideas in the process

6. Explore Design Communities:

Engage with online design communities to connect with like-minded individuals. Platforms like Behance, Dribbble, and design-focused forums provide spaces to showcase your work, receive feedback, and become inspired by discovering the work of others. Participating in these communities can reignite your passion for design and expose you to new trends and techniques.

Resources: 

Behance  

Dribbble 

Awwwards 

Savee 

Branding style guides 

Conclusion:

Overcoming designer’s block is an ongoing journey, and each designer discovers what works best for them. By incorporating these strategies into your creative process, you’ll not only conquer moments of stagnation but also develop resilience and a deeper understanding of your creative self.  Designer’s block is a temporary setback, and with the right mindset and tools, you’ll find your way back to a world brimming with design possibilities.

3 Easy Tips for Dressing Professionally on a Budget

Two rounded frames with neutral colored clothing over a neutral background saying dressing professionally on a budget

By Abbie Lee

I’m sure you’ve all heard the saying, “First impressions last a lifetime.” Though it’s a classic cliche, it’s rather true. Your style represents an aspect of who you are and may be something others notice immediately. Your outfit can play a large role in the impression you make, especially when you’re in a professional setting. 

Whether you’re giving a presentation, taking headshots or joining a meeting, it’s essential to ensure that your attire is appropriate. In a social psychology study, they found that participants who were told to wear formal clothing before taking a cognitive test showed “increased abstract thinking.” What you wear actually impacts how you think! 

As a college student who never had to worry about business attire until joining TGC, I picked up a few tips that helped me find my own cost-friendly professional style. 

  1. Building a Capsule Wardrobe

Every influencer on the planet will tell you that basics are important– and they’re right. Having staple, timeless and basic pieces can take you far. Being able to rotate items in your closet will allow you to rearrange and create outfits with items you have already worn. 

If I’m ever in quick need of a basic top, I head to Target. I’ve bought multiple basic tank tops and shirts that range from $5-$7. If I’m ever in need of some cute, basic and affordable trousers, I head to H&M. The color palette is neutral, the price is reasonable and the pants are timeless. 

Many trends nowadays can give off a professional look such as blazers, leather jackets, trousers, long skirts, sweater vests,  etc. There are many ways in which you can incorporate professional attire in your everyday wardrobe.

“You can still dress to impress while keeping it profesh!

When building a capsule wardrobe, keep it simple. Buy items that have a neutral color palette, as rotating and mixing up the pieces will make your mornings easier.

  1. Shopping Second-Hand

Buying a whole new wardrobe isn’t cheap. As someone who loves to dress to impress, I’m still a college student. Finding professional attire that won’t break the bank can be rather tricky. I’ve had to think of cheaper options when looking for professional clothing. It’s safe to say that thrifting and consignment stores have changed the game. Over half of my professional wardrobe consists of items that were found at a thrift store. 

Chico has a range of hidden gems when it comes to thrift stores. Show Love Thrift has different deals every day where you can find clothes at an even cheaper price. Late Bloomer Vintage Boutique is a new thrift store in Chico where you can “Shop all eras of vintage.” The shop is colorful, bright and fun making the shopping experience even better.

Shopping can take a lot of time out of your day and if there’s one thing I’ve learned as I am wrapping up my junior year, it’s that time really is of the essence. On days that I may be too busy, I often lean on online second-hand stores like Depop and Poshmark. These are great options as you can shop for sustainable and cost effective options from the comfort of your home. Not to mention, the range of items is even greater! 

Not only does shopping second-hand mean that you are helping the Earth, you’re also helping your wallet. The clothes provided in thrift stores are endless and some items are timeless. You are able to find a range of professional attire, such as blazers, button-ups, blouses, trousers and coats, for a fraction of the original price. I found the cutest blazer from Goodwill once and it was $4. Talk about a steal!

P.S. If you are in need of some accessories, thrift stores always have some hidden gems. 

  1. Getting Creative!

Accessorizing an outfit can add a lot to your look without costing a lot of money. 

Influencer Hannah Harrell pairs tights to her black top, black mini skirt outfit.

You’re in the mood to wear a mini skirt to a meeting? No problem– just add tights!

You’re wearing a monochromatic outfit that you feel is kind of boring? Easy fix– throw on some cool jewelry or wear a cute purse!

Influencer Hannah Harrell and friend in Milan, Italy accessorize monochromatic outfits with chic purses.
Brenden Ellis, student at SBCC, spruces up his outfit with a thrifted belt.

Your shirt is tucked into your pants but it looks bland? Add a belt and call it a day!

Dressing professionally doesn’t have to be expensive. Finding affordable, realistic options for yourself will help you and your wallet in the long run. When you look good, you feel good. When you feel good, you unconsciously unleash a positive cycle that reflects on how well and how confidently you complete tasks and communicate with others. Gathering these tips have changed how I dress for my internship and how I think about my path to success. 

The Best Steps To Take When You Get A New Client

First Client In Public Relations? Follow These Steps

By Dylan Griffith

So you are just starting a career in Public Relations and were assigned your first client. There is a lot to do and not a lot of time. However, there are a few things you can do to kickstart your client relationship.  

  1. Research 

Always start by looking into your client and their company. Before figuring out what your job will be it is essential to take a closer look at who you will be working for. Researching the company’s goals and objectives to see what they do will help guide the work you do. It is also important to figure out who their audience is so you understand the people you are trying to communicate with. 

  1. Create an Organizational System 

Staying organized is one of the most important things you have to do when working with a client. Remembering meetings and deadlines are crucial. I recommend having multiple tactics for the organization which may include a written planner and a reminder app for your cellphone. Always have a calendar on all your electronic platforms so you can check it at any time. These tools can help you stay on top of upcoming deadlines and ensure all your work will be done in a timely manner. No client wants something completed late. 

  1. Make a PR Plan 

After meeting with your client for the first time, create measurable goals for where you want to be when the job is over. In doing this you can go and look during the middle of the job to make sure you are on the right track to complete the goals you set. If you are not on track then this lets you see what has been working so far and what hasn’t. 

  1. First Meeting 

Your first client meeting is when the client will have a chance to get to know you and your team, so first impressions are everything. Come prepared with your own questions so you are clear on what your goal is. Express what you have learned in your research on the company before the meetings and come up with early examples of how you think they could improve. Go at this respectfully. You might say something like, “I see you are doing this currently but, I think if you tried this tactic as well you will see better results.” This shows you are not being rude but trying to help them from the start. 

  1. Be Yourself 

The Public Relations world is a fun and exciting environment. Always be very professional, but do not be afraid to be yourself. This industry thrives on people being creative and trendsetting. 

“No one likes public relations robots. Always try to be creative”

-Dylan Griffith 

  1. Portfolio 

Throughout your time working with the company, keep track of all the work you create for them. It helps to send reports and updates to your client. Share everything you have created so they never question if you are doing enough. Also, help build a portfolio to show others the work you have created in the past. 

  1. Finally

I know all this information may seem like a lot at first but over time it will become like second nature. All these steps will help you grow your career from these simple steps.

Perfecting Your LinkedIn Profile

Perfecting Your LinkedIn Profile

By Eve Miller

Your LinkedIn profile will likely be the first place recruiters look when you apply for a job. They’ll be asking themselves things such as, “Is this person active on LinkedIn?” “Are they showing interest in news about their career and field?” Recruiters and hiring managers are trying to find things you normally wouldn’t learn with just a resume.

With this in mind, it’s essential to stay up to date with your LinkedIn and start one as soon as possible if you haven’t already. It can be daunting to figure out what to do with your profile as there are a variety of different features, and everyone’s page seems to look different. Instead of spending hours mindlessly searching for what you want, follow these five simple steps and get ahead on job searching.

  1. Have A Good Headshot

Learn how to take a good headshot. While it may not seem like a big thing, headshots can help you stand out among some of the competition. Looking professional gives you the upper hand and lets your future employer know you take yourself and your career seriously. 

It doesn’t have to be a big production with lights and a fancy camera.  Just putting on a nice shirt and having a friend help you take a photo in front of a neutral background can make the difference between the ominous blank gray circle and a nice friendly headshot.

  1. Look For Connections

Sync your contacts. Just do it. Even those people from high school that you never spoke a word to outside of a group presentation can get a connection request. Most people who at least know your name are willing to connect and as that number of connections goes up, so will your job search network.

LinkedIn’s goal is to show that you are always three people away from knowing everyone. Utilize your first connections to make more with second or third connections. This is a great way to network and is almost as effortless as scrolling through your phone on social media. You’ll be able to see how many alumni, friends and other connections you know that work at the companies where you want to apply. 

“You never know who may be the ‘in’ to getting you your future job.”

-Eve Miller

  1. Gain Badges And Skills

It’s time-consuming, it’s painful, but it’s useful. The skills tests LinkedIn offers are an amazing way to start building your LinkedIn profile and demonstrating you are kick starting your career. The quizzes take anywhere from 5 to 20 minutes and even allow you to narrow down your job search because it gives you more accurate suggestions based on the skill tests you’ve taken.

  1. Engage With Others

Just like we tell our clients, you must be active on social media. Engaging with your following by liking, commenting and reposting shows that you aren’t on LinkedIn just to find jobs. Engaging is a great way to participate in your industry more generally. You want your future employer to know that you care about the people you connect with and follow. This shows that you’re invested in your career and aren’t just in it for the money, but that you genuinely enjoy what you do.

  1. Cold Messaging 

Cold messaging is tedious and something that is debated. The truth is, it works 50% of the time. Cold messaging job recruiters or even people within your field who have your dream job is not only a smart way to gain connections but also helps you find out more about your career.

Asking questions about how others landed their current job, or even asking why they got into the career, helps you better understand the field you’re entering. If you’re lucky, it can end in an interview for a job. It’s not guaranteed that a cold message  will lead to an interview, but it’s a step in the right direction as you connect with more people and apply for jobs.

LinkedIn doesn’t have to be as scary as logging into Facebook for the first time. It can be simple, easy and helpful for networking and learning more about your career. These five simple tips take no longer than twenty minutes a day and can make your profile look like you are already a professional.
Remember, connect with everyone you may come into contact with, it could create opportunities that didn’t exist before. That being said, connect with me on LinkedIn. 🙂

Let’s Talk Professional Communication!

Up Your Email Game Today!

By Skylar Trostinsky

If you’ve ever met me in person, you know I have quite the personality. It’s much easier for me (and many other professionals) to talk with someone face-to-face. This way we can effectively spread information, view body language, and make connections! Alas, this now virtual world has been inundated with digital communication and that means we must learn how to be professional in person and through text, too. 

Communicating with an agency, client or representative can be a daunting task. Do you keep it dim and straight to the point? Or do you add a bit of flare and personality? I mean, you want to express who you are, especially when you work in public relations, right? With a semester of email chains, project delegation and more under my belt, I have learned a few tips and tricks for communicating online. 

  1. Set Goals for Emails 

Staying organized is key to receiving useful documents and information. Before typing emails to agencies, clients or coworkers it’s important to set goals within the communication chain. That person is just as busy as you, so do them and yourself a favor by creating an outline of who you are writing to, what you need from the recipient and what you want them to respond with.

  1. Use Your Subject Line!

When considering the workload your recipient may be dealing with, it’s imperative to use brief, catchy subjects that include keywords. With this, your reader will know exactly what to expect when clicking on your email or maybe even be tempted to respond. 

  1. Be Clear and Concise 

Avoid using an excessive amount of words in emails, especially when providing instructions. Separate thoughts, questions and suggestions with paragraph breaks, bullet points, etc. to highlight information. This also allows recipients to quickly skim through text and find their to-do’s! 

Utilize appropriate punctuation and refrain from using ALL CAPS. Although it’s OK to bold and capitalize some notes, you never want the addressee to feel like you are shouting at them. 

  1. Be Polite and Be Yourself 

Here comes the question of whether personality is necessary, or appropriate, in an email chain. Although clarity and conciseness are imperative aspects to communication, you should never hide your character from anyone! It’s just critical that you remain professional and consistent with a soft, inviting tone. Check out READCITY’s “5 Clever Ways To Give Your Business Emails Personality” for more tips.

  1. Proofread, Proofread, Proofread!

As a PR professional, one of the worst things you can do when communicating with other experts is to send emails without reading them over. Typos may send negative messages about you or your organization and generally come off as unprofessional. 

A way to make sure your emails are grammatically correct and have been spell checked is by writing them in a separate document first. Doing this has helped me draft numerous messages, with different formats to ultimately choose which version will best convey my points. 

“Although clarity and conciseness are imperative aspects to communication, you should never hide your character from anyone! It’s just critical that you remain professional and consistent with a soft, inviting tone.”

-Skylar Trostinsky

Professional communication doesn’t end in email chains! Further your credibility, express yourself and improve relationships by taking skills such as goal setting, clarity and politeness to group and one-on-one meetings. Email away!

Resources: 

Tips For Professional Emails

Effective Email Communication In The Workplace

Online Resources for Graphic Design

Graphic design of a laptop

By Claudia O’Brien

As a graphic designer, having a foundational knowledge of graphic design principles is essential but can always be helped with tools and resources. 

“We live in an age where there is endless information and material provided by renowned designers and artists online for free.” – Claudia O’Brien

I believe using this online field of information to an advantage is essential to any design student looking to advance their skills. In this blog, I will feature several of my most favored resources online.

Chico State’s Adobe Creative Cloud

I shouldn’t write a blog about this topic without mentioning our university’s prepaid subscription to Adobe. Adobe Creative Cloud is a subscription package that enables access to all Adobe software, fonts, free images, and more. If you’re a student enrolled at Chico State, all you need to do is submit a request to the university’s IT support team and download the Adobe Creative Cloud dashboard. The university offers this service completely free for students.

Colors

Sometimes knowing color theory isn’t enough to create an appealing set of hues right out of your head. My first go-to is Coolors.co. Fabrizio Bianchi founded the website and is a web developer known for creating exceptional and contemporary websites. 

The biggest sell on this particular site is its highly interactive color palette generator. The generator displays attractive color palettes that can be randomized to another color palette, customized by individual hue, be tested for color blindness/accessibility, and many more features on the same web page. Each generated color has its color codes on display for users that are looking for the most suitable hues for screens and printing. Besides the generator, the website has other unique features: hundreds of palettes created and shared by other users, a tool for picking colors from images, and a contrast checker.

Free Images

Free images are classified as public domain- they do not require copyright and royalty fees. Unsplash.com is a beginner-friendly site that has many high-quality free images. The website does not require users to make an account, and there is no limit on the number of images you can download. The images are categorized by themes of Travel, Nature, Business, etc. The site also offers a search engine. When clicked, each photo lists the photographer’s name, the location, and the type of camera used.

Mockups

A mockup is a model meant to display a product or design. An example is a design that has been digitally applied to an image of a T-shirt. When a design is shown to a client, they want to see what the design looks like on the product, not just the design by itself. Mockups can be created within Adobe software, but that takes time and skill. Smartmockups.com offers many customizable mockups free of charge. Users can upload their design to any of the offered images and 3D models and download a JPEG of a completed mockup image.

All in all, countless more free resources are available. I encourage any designer to take advantage of them, as they are there to be used! If you’re interested in learning about more design resources, this article provides various websites to check out.

Tips For Designers: How To Present Creative Work

By Sarko Sok

As designers, we learn to use our way of thinking and visualizing to our advantage, allowing us to create stunning work. We can spend hours on a single project and let our minds flow. It can be easy to become submerged in our work while diving into the creative process. That kind of passion may come to a halt for some of us when it comes to the non-design aspects of our work. This could be the organization of our files or documenting our design process as we go, but in this blog, we are going to be focusing on how to present creative work for your client.

Set your goal and know your audience

Before making a presentation, it is important to define the objective and how you can achieve it for your audience. Once that is determined, the next step is to understand your audience. Learn about their interests and motives so that you can ensure that your presentation is concise and relevant. What you are offering should feel like it is framed specifically for your client.

Tell a story

Storytelling is essential when it comes to presenting your work in any setting, and it becomes a very useful skill in life too. By being able to create a connection between you and your audience, you can spark interest in your audience and keep them engaged. Consider the tone and attitude you would like to achieve when presenting. Find a way to relate to your audience. Some examples could be through humor or shared experiences. You are essentially selling your work and your ideas so you want to sound confident and authentic. This will make your audience appreciate your presentation and trust you know what you are talking about.

Presentation visuals

The aesthetic of your presentation is equally as important as your creative work, since you’ll want to present your work as efficiently and effectively as possible. What better way to do so than by applying your design skills to the aesthetics of your presentation! 

Also, remember the design fundamentals that you apply to your creative work and do the same for your presentation.

 Some tips that help me on an everyday basis:

  • Consider your composition and utilize your negative space
  • Be creative with your text, but do not overdo it
  • Everything should still be readable 
  • Use font hierarchy to highlight important messages and clearly communicated content structure
  • Be selective with your text and take advantage of visual aids to keep the audience focused

Rehearse your presentation

A great way to work out any kinks in your presentations is to practice in advance, to ensure what works for you or what is not necessary to include. Once you familiarize yourself with all aspects of your presentation, you will be able to make the necessary adjustments to finalize everything. The presentation of your work should be treated the same way as your design work. Trial and error, revisions, and process work for design, all contribute to perfecting your work. Practicing your presentation will perfect your pitch to your client.

Adobe Illustrator: My 5 Essential Adobe Illustrator Tools


By Miguel Villalobos

Adobe Illustrator is a popular software application that designers and artists use to create different variations of artwork. This program specializes in creating vector graphics and offers many different design tools that are great for creating things such as icons, logos and illustrations. The program can seem overwhelming for people who are just starting out, however, it does get easier over time. Throughout this piece, I will walk you through a few of my favorite tools in Illustrator that have helped me improve my workflow and skills. 

The Blend Tool

The first tool I want to talk about is the Blend Tool. This tool can be found by going to Object > Blend. This tool can help you create unique and interesting blends between multiple objects, and has different settings that allow you to customize your blends as you work. 

Below is an example of using Object > Blend > Make, while using the Smooth Color option. As you can see, it blends the shapes together and creates a gradient.

Here is an example of using the Blend Tool with letters, while changing the options from Smooth Color to Specified Steps. You can clarify how many steps you want between each shape. You can find this by going to Blend > Blend Options.

Smooth Tool

The next tool I want to talk about is the Smooth Tool. The Smooth Tool really lives up to its name. It helps you smooth out paths that may be a little more rough or wonky than you would prefer. It is great for helping sharpen up your attention to detail on different vector shapes. 

In this example, I created a shape with a few rough edges. By selecting the Smooth Tool, and just running it over the anchor points a few times, it will smoothen out the edges for you. 

Type on A Path Tool

The Type on a Path Tool is without a doubt one of my favorite tools in Illustrator. It allows for you to make text write along different paths that aren’t just horizontal or vertical. You can use it for any path that you create, whether it is by using just a plain shape or by creating a path with the Pen Tool.

Here is an example of how the Type on a Path Tool works. You can create a path using any form. For this example, I just used a circle. Using the Type on a Path Tool, you simply click on the path and it will turn your path into a guide for your text. From here, you can manipulate the text and the beginning/end of the path. 

Here is an example of the tool being used on a different path that was created using the Pen Tool. 

The Knife Tool

The next tool I want to focus on is the Knife Tool. The tool is extremely simple, yet extremely effective. It really does exactly what you would expect. It allows you to slice through paths, giving you more precision with your vector shape building. 

As you can see, you can take any vectorized shape, and simply slice through the shape and it will create a new path. You can move or remove the new sliced part of your vector to fast track your process. 

Paintbrush + Brush Library

The Paintbrush Tool is a tool that allows you to hand draw strokes onto your artboard. You can find the Paintbrush Tool on the side panel or by using its shortcut, B on the keyboard. The tool lets you give your projects more of a hands-on aesthetic to them. 

Along with the Paintbrush tool, there is a whole library of different brush strokes you can utilize. You can find the Brush Library by going to Window > Brush Libraries. The Brush Library holds strokes such as watercolor brushes, calligraphic brushes, and even different types of borders that you can expand and vectorize. 

Here is an example of the different types of brush strokes being applied. 

Wrapping up!

Illustrator can be fun and with a little time and effort, it can become easy to use. All the different tools and icons can be intimidating at first, but instead of being afraid, just jump in and play around with them. I mean, what is the worst that can happen?  When you finally learn how to use one, it can feel extremely gratifying. Add that feeling of gratification alongside gaining more overall skills as a designer, and it’s a win-win! Thank you for reading and I hope that you learned something new along the way!

5 Creative Tools to Help You Design

By Jessie Chen

As we continue to experience the pandemic,it’s important to sharpen our tools. We all have tools that help us get through the day, as a mechanic has their tools, teachers with their educational tools, and we designers have tools too! So let’s go ahead and immerse ourselves into some design tools, because it may help you solve a creative issue. 

“Buckle up and get ready to make digital art at the speed of thought!” – Rob Hooks

Some of you may think these tools are common and you already know them, but we all can learn something new everyday. Now these are some varying tools that may not apply to everyone, but they all have their purpose in the creative field. 

  1. Adobe Capture

Adobe Capture is a great tool. It is a mobile application that is on both Android 

and Apple stores. It’s a really great tool for any designer, whether you’re 

freelancing or with an agency. Some perks are that it can help you figure out what kind of font your client is using, but they might not know off the top of their head. Or, the client didn’t receive it from a previous request from another designer, who didn’t include extra details like fonts and color. Adobe Capture brings up the most closely related font or that exact font. Another helpful tool within this application is the color option. Simply move your camera to your desired spot and it’ll pick out colors that work well together from your camera shot. You can move around the camera, as you move you’ll see at the top of your device the colors change accordingly. It will not set the color until you hit the capture button. There are many other functions within this application, but these are the ones that I found most helpful.

  1. Adobe Color

Adobe Color is a browser application that is really simple to use. You pick a color that you want to use as your main color out of the many options like analogous, monochromatic, or complementary colors, and many more. It’s great for creating your color palettes or helps if you are having trouble creating them! 

  1. Unsplash, Pexels, Pixabay.com

These websites are great to use if you happen to need a photo of professional 

quality and is non-copyright! They’re fabulous websites to check out if you’re in need of filler photos or free photo usage with your designs or websites or layouts.

  1. Behance

Behance is another great website. You can showcase your work or see other 

people’s work. It’s also a place to gain inspiration from in case you happen to hit a mental block and can’t seem to get any concepts out. Additionally, you can join in on conversations on other people’s creative work. Behance is a really a place of opportunity to explore and talk to other designers as well!

  1. Dafont

This website is resourceful for getting fonts or trying out new fonts for your 

creative projects! This site includes both paid and free fonts available for download. You can filter them out to get only free fonts, or however you want to filter out the font selections.

These are some of the creative tools that can help a lot in your projects. Check out the links below to find more tools to use. Also, these tools are optional, you don’t need all of them to be successful!

https://99designs.com/blog/design-resources/best-tools-for-graphic-designers/

The Rise of TikTok

Photo by Canva, logo by TikTok

By: Tiana Pena

With more and more individuals being forced to quarantine at home. Tiktok has started to rise it’s numbers of downloads and engagements in the past 3 months! As a PR specialist it’s important to keep up with these new apps that are being developed. It is also important to be conscious on how to use them. I decided to download the app and see for myself. Within 2 weeks I gained 3,000 followers. Here are some things I learned along the way!

Continue reading “The Rise of TikTok”